
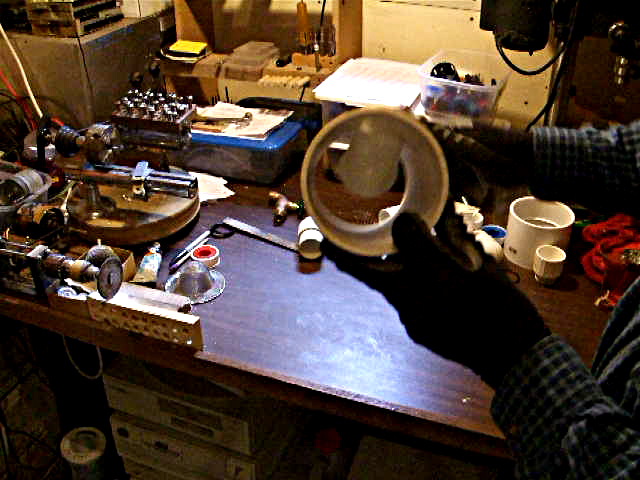
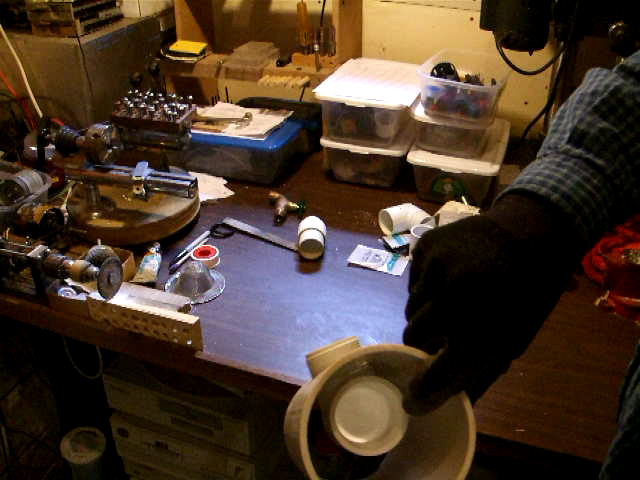
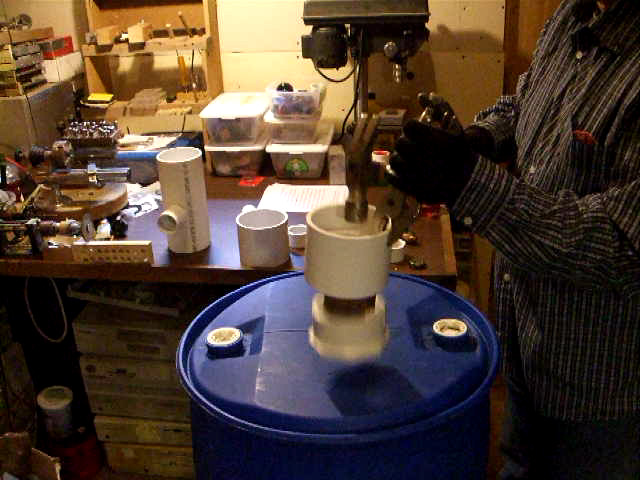
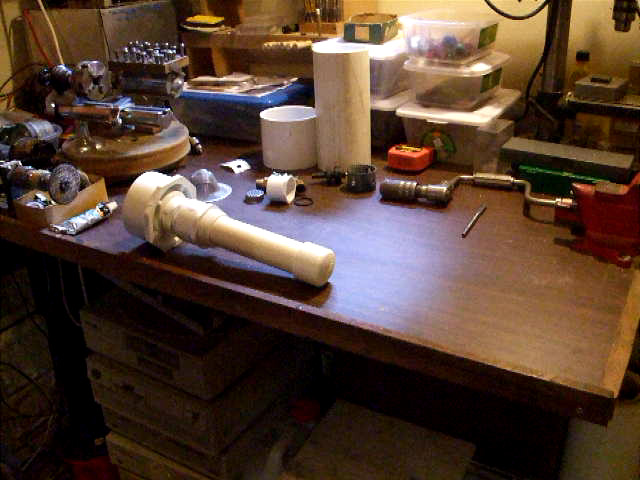
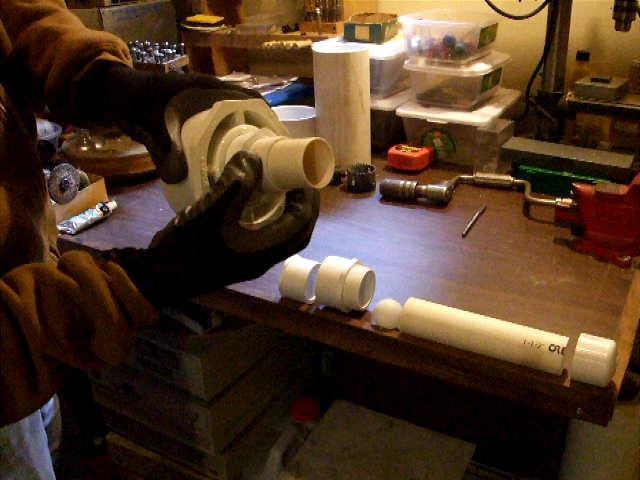
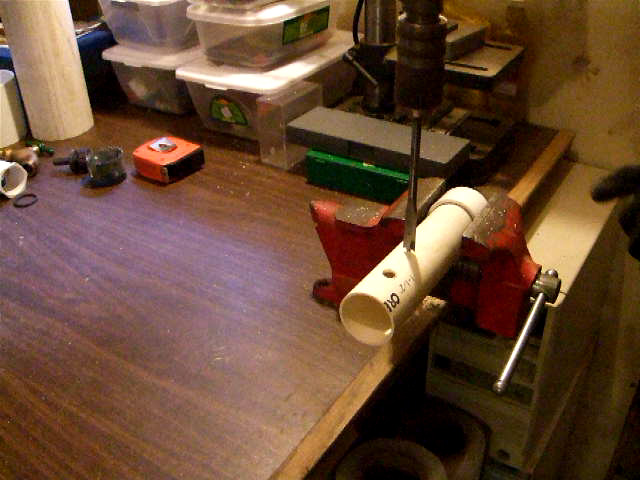
The new diverter is finished and installed. A video will be out when I get time to edit all the files. In the mean time here are some screen shots of a few of the videos and some photos of the complete diverter. Sorry about the duplicates, I don’t have time to edit them now. 


-
Archives
- May 2025
- April 2025
- June 2024
- January 2024
- June 2023
- January 2023
- December 2022
- November 2022
- June 2022
- May 2022
- April 2022
- January 2022
- December 2021
- November 2021
- October 2021
- August 2021
- July 2021
- June 2021
- May 2021
- December 2020
- August 2020
- May 2020
- August 2019
- June 2019
- April 2019
- March 2019
- January 2019
- November 2018
- March 2018
- January 2018
- November 2017
- April 2017
- February 2017
- January 2017
- August 2016
- June 2016
- May 2016
- April 2016
- October 2015
- June 2015
- May 2015
- April 2015
- March 2015
- February 2015
- January 2015
- December 2014
- November 2014
- October 2014
- September 2014
- August 2014
- June 2014
- May 2014
- April 2014
- March 2014
- February 2014
- January 2014
- December 2013
- November 2013
- October 2013
- September 2013
- August 2013
- July 2013
- June 2013
- May 2013
- April 2013
- February 2013
- January 2013
- December 2012
- November 2012
- October 2012
- September 2012
- August 2012
- July 2012
- June 2012
- May 2012
- April 2012
- March 2012
- February 2012
- January 2012
- December 2011
- November 2011
- October 2011
- June 2011
- May 2011
- April 2011
- March 2011
- January 2011
- November 2010
- October 2010
- September 2010
- March 2010
- January 2010
- August 2009
- July 2008
-
Meta
Hello again! I’d love to see your new video so I can get a better idea of how to put the diverter together. I was at the hardware store today trying to buy the fittings but I couldn’t see how it would work. The 4-inch to 2-inch reducer adapter (also called flush bushing) I can get is flush, no flange at the bottom, but I don’t think that’s an issue.
The 1.5 inch pipe (drilled holes) does not tightly fit into the 2-inch threaded male adapter. You say to glue this part of the fitting (aren’t you using pvc cement for all the fittings?) but since it’s not a tight fit I don’t see how it stays water tight.
How high up does the 1.5 inch pipe go? Just to about the top of the threads?
The two 2-inch to 1.5 inch reducers that are back-to-back. How do they fit together? Is there a small length of 2-inch pvc pipe joining them?
Thanks for your help!
I have just uploaded part one of the video; it explains some of your questions, Jason:
http://www.youtube.com/watch?v=ch-YsD9rOGk
There will be lots more to follow, including a series on how to put together a slow sand filter.
Saw the video, thanks, that definitely helps. I’ll try to make this thing again. Looking forward to the next video!
Hi, thanks for all of the great detailed info – the u-tube video was especially helpful. I am in the process of setting up my first system, I don’t want to screw it up and end up with toxic stuff in my new 500 gallon underground tank, so I am frantically trying to figure out what I really need between the gutter downspout and the 4″ tank opening. Questions:
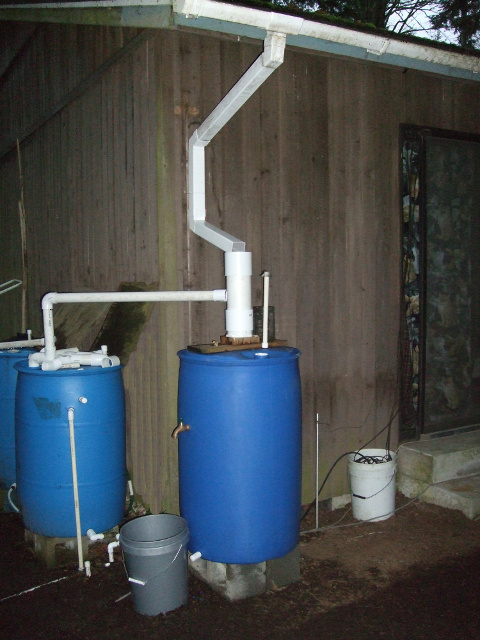
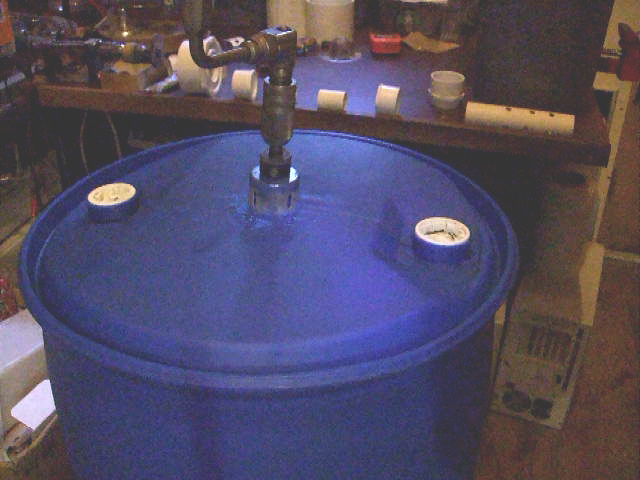
In your picture, is the first barrel the diverter tank and the second one a slow sand filter or? And what is the wood for? I see you have what looks like a gap between the gutter and the 4″ PVC: I was thinking about doing something like that and using a permanent coffee filter there to catch little gritty bits so they can’t find their way to the pump in the tank. Would a filter there even be necessary or would the gritty bits get trapped in the diverter barrel making a coffee filter redundant? Also, with my set up, would the sand filter go before or after the cistern? I am thinking the water may be traveling too fast for a slow sand filter to work correctly if it is placed between the downspout and the cistern. Any help will be appreciated,
Thanks!
Thank you for the comment, Nikki. The diverter is first, then the second barrel on the left in the top picture is (now) just a holding tank, but soon will be another slow sand filter. The wood on top of the diverter barrel is a spacer and support for the top section of the diverter. The pipe from the diverter will feed into the slow sand filter with a 5 gallon bucket on top. The slow sand filter will be a similar design to “filter 1” on slowsandfilter.org . As you probably know, the type and quantity of pollutants in your runoff water are directly proportional to the amount of pollutants in the air and on the roof surface, so storage can be a problem depending on the situation. Here, a first flush diverter is enough in the winter, but in the summer the temps go up and water gets stagnant very quickly, so most of the storage is filtered water.
The diverter will take out most, if not all of the sand-like material that accumulates in the gutter from composition roofing. In the system here, it falls to the bottom of the diverter barrel and is cleaned out each year – its never been a problem for the pump used here. In the top of the 4 inch pipe is a stainless steel screen (the kind you can buy at the hardware store – I got these at Lowe’s I think they are for a kitchen drain – they fit nicely in a 4 inch pvc coupler ) – it keeps out all of the large debris that falls into the downspout. The bottom part of the downspout comes off really easily and the screen can be lifted out to remove pine needles, leaves and twigs. This takes about 30 seconds to do. Very easy. Most of this will be in the next series of videos.
Water with a high bacterial content will go stagnant very quickly as temperature increases, so it is best to filter it first if possible. The order of operation (ideally) should be ( from start to finish ) : water runs from the roof into the gutter, then downspout, then diverter, then filter, then storage. However, as you point out, the water will come off of the roof way faster than a small slow sand filter can handle it, and some areas get lots of rain very quickly, so in most cases, water ends up getting stored first and then filtered at a rate that the slow sand filter can handle. The flow rate on an ssf (slow sand filter) will change over time, which further complicates the issue. If you intend to have all the water go from your diverter to a slow sand filter and then into storage; and you do not want to allow any of the runoff to be lost, you will need to make sure the flow rate of the filter matches the maximum flow rate from the diverter which will be (I assume) the same as the flow rate from the downspout. The flow rates for three separate small slow sand filters are listed in detail on slowsandfilter.org.
What I do here is store the water from the diverter in a temporary holding tank, it is then filtered and goes to final storage. With only one large storage tank, your options are somewhat limited. The operation here using roof water is small scale; with 100 gallons of temporary storage and about 300 gallons of filtered water stored in 55 gallon barrels. As a result, lots of roof water is lost to overflow. Since we do not use the water as our main source, this is not an issue. We do not use the water from any of these filters for drinking water. In Western Washington state here, we have very little rain in the summer months, and so water must be supplied to the slow sand filter by pumping stored water slowly through the filter to keep in alive in the summer. So far, for the past 4 years this has worked. Even recirculating filtered water through the system has been enough to keep the biofilm alive until the fall and winter rains come along. The thing is it only takes one rain event in the summer to re-fill the pre-filter storage with unfiltered water – and the thing the filter really “likes” is unfiltered water, because it gives the biofilm food.
I know there are lots of people in Australia and New Zealand who use roof water without a slow sand filter – but they are in a completely different environment than we are here. I am not sure what your situation is, but if you are in an area with trees, and wildlife nearby, you will very likely have lots of nasty bacteria in your roof water, and may want to filter it before you store it. The first year I set up the filter and storage, I had a nasty mess with several hundred gallons of very stagnant water that was unusable, that was before the first flush diverter was added. After the diverter was put in the system the water was much less stagnant at the end of the summer.
Thank you for the quick and thorough reply! I just got back from Home Depot with all of my bits and pieces, I also picked up the sink filter you described and a little one too for the top of the vent pipe (like you have in the pic). I can’t wait to get started with my assembly! I still need a ping pong ball, but so far all the other parts in your video cost about $22.00 total. I was planning to use concrete containers instead of the plastic barrels for aesthetics, but now I wonder if I would be better off just using barrels and slapping some hypertufa over the exterior of them after the set up is complete? By my calculation, I only need to divert about 10 gallons of first flush, so I had made a 10 gallon concrete container with holes in the right places for a drain at the bottom and a 2″ pipe and a 1/4 ” vent pipe in the lid, but the plastic barrel may be easier to seal…I have the gutter guy coming tomorrow so I need to have some idea where to tell him to end the downspout. …hmmm.
I am in North Central Texas, we have random flash flooding type rains in the summer and also long stretches with nothing but dry and hot, rarely we get a gentle short rain. My roof collection area is about 500 square feet of fairly new composition shingles (2006). There is no tree canopy anywhere near the roof, so just the occasional bird passing over and dropping a load. That and insects. I am not out in the wild, but not too close to any freeway so I think pollution may be medium-low. We do have a ridiculous amount of heat in the summer, but I wonder if the impact will be minimized sufficiently since the top of the concrete cistern is at least 18″ below the ground level. If I use the diverter but no sand filter prior to storage, do you think the water will still get stagnant and funky in this pitch-dark somewhat cooler condition? If not, I think it would be much more workable to put the slow sand filter at the other end of the operation – so water coming out of the tank would go through it at a more easily controlled pace (or less water would be lost to overflow). And, I could put several barrels at that end as they could be located in a more remote location (my diverter container will be visible from the street). My intent was just to use this water for my vegetable garden and fruit trees, but I do like the idea of being able to run the end product through another EPA approved type filter to make it drinkable should it ever become necessary.
I can’t wait for the next video! I need to know what’s going on with the 4″ pipe above the diverter, I had been planning to use a 3″ elbow from the downspout with a 3″- 2″ T (with the 2″ portion dropping into the diverter container) then transitioning the 3″ pvc pipe to the 4″ cistern opening. Must read more!
Thanks again,
Nikki
My humble apologies to all waiting for part 2 of the video. Outdoor maintenance work that must be completed during the summer months here has taken priority over video editing. There is a window of opportunity (often very short) when the weather and available daylight permit outdoor work in the Seattle area. The video of part 2 and more will be up as soon as the other work is finished.