Concrete block cistern

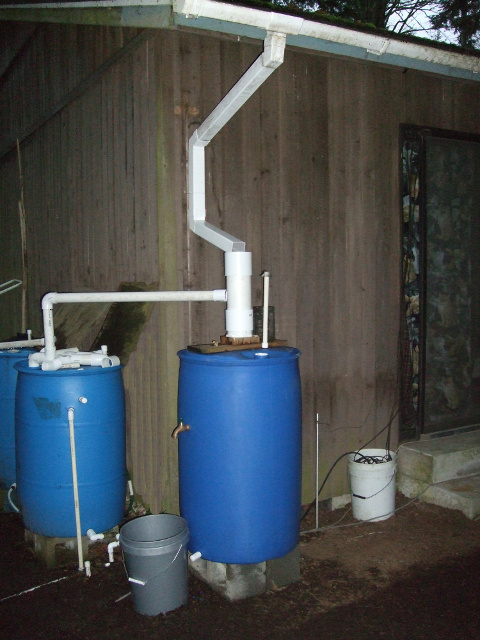
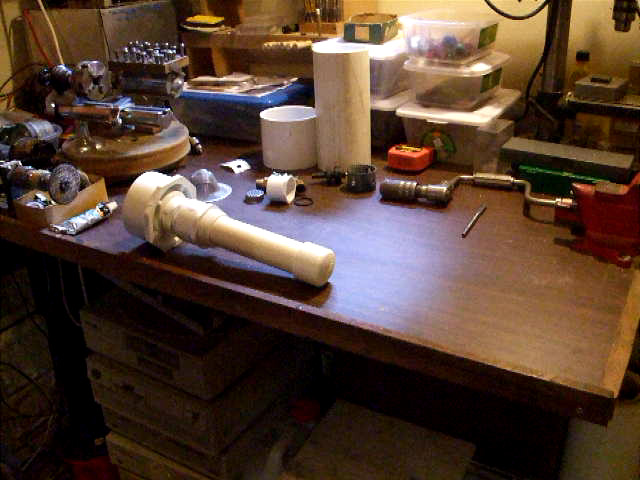
Roof water harvesting is a good idea, but how does one store the water? A large container can be quite expensive and may require considerable space; and water is very, very heavy. If the container is to be above ground it must be able to support the weight of the water to be safe.  Consider this: a 55 gallon barrel is more than most people can even move when it is full of water (1 gallon weighs about 8.35 pounds    8.35 X 55 = 459.25 pounds).  One possible solution is a concrete block cistern built partially under ground. If a person has an area 15 feet by 15 feet and is able to dig down 3 feet, a good sized cistern can be built that will hold thousands of liters ( several thousand gallons ) of water safely.  We chose concrete blocks because the cistern location is not accessible to trucks or any kind of large petrol powered equipment. We did not want the forest trashed by putting in a road.  We have already been through some of the problems with concrete block cistern construction and this post may help others. Some of the advantages of a concrete block cistern are that it can be built slowly as money and time are available and there is no need for heavy equipment access, or setting up concrete pouring forms.  Do not use “pumice” blocks – they may also be called lightweight blocks – they are way too porous.

The concrete block cistern ( mentioned on slowsandfilter.org ) that holds water from filters 2 and 3 has finally been completed and found to be free of leaks. The project started out with the intention of sealing the blocks with Blue Max; but that did not work out. The temperature was too low and there was too much moisture in the ground for the sealer to cure. As it turned out, portland cement was the best choice. It is called “hydraulic” cement – that’s a fancy way of saying that it sets, cures and hardens best with water available – in fact it must have water available. Also temperatures of 50 degrees F and humid conditions are well suited to the curing and and setting of portland cement.

What we had to do was apply 6 coats of portland cement (“portland cement” does not mean it is made in Portland Oregon, or Portland Maine) to the surface of the concrete blocks. One of the coats had 15 percent #70 sand added.  The cement is mixed to a consistency of wet mud (like pancake batter) and applied like paint with a large brush. Note, however, if you can apply it with a roller it is too thin and contains too much water.  There were lots of inconsistencies in the construction as mortar was occasionally applied in a very unprofessional way.  This was partially due to the fact that we made the cistern fit in rather than ripping up tree roots and trashing the forest, so the thing was not built as a “perfect” square.

Cement of this type ( type II portland cement)  hardens well under water and the stuff we used is ansi 61 approved.  My advice to anyone trying this is to first make sure all of the mortar joints are fully filled on both sides inside and out. Seal both sides of the bricks, fill them with concrete and 1/2 inch rebar. Use at least 6 coats of portland cement and put 2 or 3 extra coats at each joint and around the bottom where the bricks sit on the concrete pad.

If you live in an area where there will be three or four weeks of hot days, absolutely no rain,  and low humidity, the Blue Max sealer might be a better choice than portland cement – but caveat emptor do not use the Blue Max sealer without reading the directions and following them exactly. Keep in mind that concrete absorbs moisture from the ground and it will prevent the rubber sealer from curing. My experience has been that if you allow that product to cure as indicated by the manufacturer, it is excellent and I would highly recommend it over portland cement; as it is somewhat flexible and will likely remain effective even if the concrete cracks. However if it does not cure correctly you will have a nightmare of a mess.

After all this, if I had it to do over I would use 4x8x16 solid cap blocks. For a 10X10 foot cistern 5 feet deep the cost for blocks would be about 545 dollars, and you don’t need to fill them with concrete, which will save lots of work and about 500 dollars. Also more mortar can be used between the blocks so that would add strength (and possibly) compensate for the lack of rebar, and mortar is easier to mix than concrete – try it!!  ( There is a mixer attachment that fits in an electric drill that will mix up a 60 lb bag of mortar in about 2 minutes easily if you use a 5 gallon bucket and exactly the right amount of water) . The whole project would be less expensive and easier to build if you are not a professional ( applying mortar to an 8x8x16 concrete block is not an easy task even if the mortar is mixed correctly ). The structure would still need to be sealed, but the blocks are not hollow. The only disadvantage I can see is that it would be harder to re-enforce the structure with rebar.

Posted in slow sand water filter study and construction | 2 Comments

Science, observations, experiments, results, peer review and the internet

Biological sand water filters (otherwise known as slow sand filters) are becoming popular. To all those people who have put up YouTube videos claiming to have built a slow sand filter that can be backwashed by forcing water into the output and churning up the sand from the bottom up – I say you are wrong; totally wrong.   There are hundreds of studies that have been done on these filters that show beyond any reasonable doubt that backwashing a biological slow sand filter will destroy it, and most likely mix harmful bacteria and helminths (small worms) far down into the sand layers resulting in horrifically toxic water output.

I hope people actually read some real studies with documented results before they actually try to build one of those filters and use it because even watering vegetables with the water from one of these ill-designed filters would be dangerous – after several backwash events the entire filter would be filled with toxic bacteria. The aggressive bacterial action occurs at the top of the filter because the sand forms its own layers due to the action of water and gravity the bad stuff is removed at the top – it needs to stay there along with the beneficial life – backwashing will mix the bacteria, including the nasty stuff too far down in the filter as the sand layers are disrupted. But don’t believe me, or the hundreds of others,  try it; just let sand sit for five or six months in a container with water flowing through it  and then try to dig it  out – it gets compacted and layered. Be very suspicious and wary of information you find on the internet. Some of it can be really great and some is just plain bs. And while I’m at it let me say, if anyone finds errors in any of the observations or test result interpretations on any of my sites, please let me know, I will respond and do my best to fix the errors – however; please back up your information with test results and documented observations or scholarly peer reviewed articles. Opinions or beliefs won’t cut it. and And again, let me remind readers: the filters I have tested and described on my sites and here are NOT recommended for producing potable water.

The internet is amazing; so much information is available. Unfortunately a lot of it is not what it appears to be.  When we are talking about science things get even more precarious. When you read a scientific article or something on the internet that purports to be science, always, if possible, follow the money trail and /or check to see if you can determine what the author’s motives are for sure. Check to see if the information is either peer reviewed, or backed up by citations of peer reviewed scholarly articles; or at the very least check to see if others have done similar work and obtained similar results.

Now where is the “money trail” for my stuff? That is covered on the websites. The funding is unconditional and private – there is no funding from any political, religious, educational or environmental group. What are my motives? I’ve already stated them: Water is not a luxury or something that should be marketed, patented and owned by multinational corporations or anyone, for that matter.Clean water should be freely available to all people. My study, hopefully, is a good starting place. I encourage others to improve on my study, but do so in an honest open way. Some have already done this – thank you!!

Posted in Uncategorized | Leave a comment

slow sand filter, biological sand filter – nomenclature vs design

First let me say; it has become increasingly obvious that collaboration is a powerful tool for the development of technology. Just look at Android which came from Linux – the ultimate technology collaboration example. When Linux first came out, certain people laughed at it – now it is recognized world wide as the best system ever created (IMHO).

Now I would like to make some clarifications here.  My filter design  is covered by the Creative Commons license, which allows anyone to use and sell the design, or add to it and improve on it, with proper citations. I do not claim that the water running through my filter design is guaranteed to be potable in all cases.

With all due respect to Dr. David Manz, the filters I have built and have been testing for the past 4 years are not “Biosand” filters. They are modified slow sand filters, and so far the tests have shown that the design is functional and “cleaning” is not needed in the same fashion as other biological sand filters, as the use is different; and furthermore, the input water is roof water or well water that has very low turbidity and / or contains hydrocarbon pollution from the roofing material and local air pollution.  So, please, don’t confuse my design with the “Biosand” filter. It is not the same. The only close similarity is that both types of filters use biological action.

Posted in Uncategorized | Leave a comment

DIY first flush diverter provides cleaner roof water

I have part one of the video on the diverter up on YouTube. It is here:

Some questions included how does the pipe seal if there is only glue on one part? How long are the pieces? The friction fit is enough to seal the parts that are not glued. Some pvc pipe does not fit exactly like the ones here so be aware of that. The od and id dimensions of all pvc are not identical. The video should give a good idea of how long to make the pieces. The inch and a quarter pipe (the one with the bevel is 2 inches long and the inch and a half pipe (the one on the bottom that will get holes drilled in it) is 10 inches long.

Posted in slow sand water filter study and construction | 3 Comments

New diverter construction

The new diverter is finished and installed. A video will be out when I get time to edit all the files. In the mean time here are some screen shots of a few of the videos and some photos of the complete diverter. Sorry about the duplicates, I don’t have time to edit them now.

Posted in slow sand water filter study and construction | 7 Comments

Slow sand filter flow rate

It is now March 8 and the flow rate test has been done. I am feeling much better, and physical work is getting easier. The 4 litre container is used now instead of the 12 litre. It is a “gallon” jug, but the 4 liter mark is right at the very top where the lid goes on, so accuracy can now be down to tenths of a second and the results are more indicative of instantaneous rate of flow. I guess I could generate the formula and then take the derivative, but it is more fun watching the water flow and using a stopwatch to time it!! All the filters have slowed down. The interesting thing is that the two filters with float valves controlling the flow essentially decide how much water will flow through based on the condition of the schmutzdecke. These filters are self-regulating and do change from month to month. I am wondering if the barometric pressure has anything to do with the change? I imagine it does because the water has to push up in the output pipe to flow out of the filter. The variation does not seem to be enough to significantly influence the water quality, although this would be something to check out . . . . when I get lots more time and lots more money!!

Posted in slow sand water filter study and construction | 1 Comment

Slow sand filter update

It is now March 1 2011, and we are nearing the end of the 4th winter for filter 1, the third winter for filters 2, and 3 and the first winter for the pond filter experiment. February, here was one of the coldest on record. The pond filter and filter 1 froze and ceased operation as of Feb 22. Even though the temperature has been above freezing for several days now, there is still ice in most of the containers. No major damage is obvious – yet. All the filters are functional as of today. Filter 2 and 3 did not freeze during this cold spell. The temperature got down to 19 degrees F here for two consecutive nights and stayed below 32 degrees F at night until the 27th of February. The average temp for the month of February here was below 40 degrees F ( 39 in Seattle ). We had about 6 inches of snow total for the month of February at this location. Driving was EXTREMELY hazardous and it is by the grace of God that we are still unhurt after attempting to drive to work in the hoard of unprepared drivers. Some places less than 20 miles from here at lower elevations got over a foot of snow in one day. Despite all this, very little damage has occurred to any of the filters. Note, however that the below freezing temperatures here do not last very long compared to other places.

In addition to the effects of weather, the filters were basically inactive for 2 weeks while we were in Las Vegas Nevada – where incidentally, water IS a big issue. They get about 4 inches of rain a year there in the valley. I’m not sure rainwater harvesting would even be a viable option without specialized equipment. I did notice lots of water flowing in the huge dry wash near the freeway – 15 I think it is. A visit to the Bureau of Land Management interpretive center at Red Rock Canyon (not too far from Vegas), was interesting and they did have a display about water there. I asked them about rainwater harvesting and they seemed amused at my ignorance. “This is the desert” they said. I should have known – but coming from an area that gets lots of rain I guess I sort of take it for granted – hmmmm; after all my rants about people who take water for granted. . . . If anyone has any information on how to capture rain water in arid environments please feel free to post it here. On the bright side, there was a very large PV array at the interpretive center, and that was encouraging.

Posted in slow sand water filter study and construction | 8 Comments

The pond filter experiment

The pond filter has been running for about 7 months now. It has frozen solid twice, however it did thaw out both times and it is still working. The most recent test showed less than 2 coliform bacteria per 100 ml of filtered water taken from the output of the filter. The most recent occurrence at the pond was a swimming event enjoyed (I presume) by raccoons. The water was full of mud, and the pond looked like a mud puddle with the water mostly opaque brownish-green. This type of event happens regularly. The leaves and other decayed organic material had clogged the pump and the water was just barely circulating. The raccoon event resulted in the loss of the fish that were in the pond. After cleaning the little pump and testing the flow, the filter was running again. Within less than 24 hours the water in the pond was clear.Clean water from the filter

The sand has settled on the bottom and the rest of the nasty stuff in the water has been removed by the filter.

Now, why is this significant? Why am I even bothering with this? Well, this is actually an experiment to determine if it is possible to put together a working slow sand filter with very, very coarse sand (.45 mm effective size) and only a flat rock inside as a baffle. The answer is yes. Now, I would not recommend drinking this water, but it would be acceptable to use it to water a vegetable garden, or to do laundry with, or just about any use except drinking – but this filter is cleaning water that is extremely contaminated – far more than any source a person might use for drinking water such as roof water or water from a shallow well which would not contain mud, nor have critters wallowing around in it. So the next step will be trying a similar set up with water that is reasonably non turbid to start with and only moderately biologically contaminated, such as roof water. . . more later.

Posted in slow sand water filter study and construction | 9 Comments

State policy on rain barrels and roof water harvesting in Washington state

To clear up misconceptions about the legality of rain barrels, rain water collection and harvesting rainwater in Washington state check these links to the Washington state department of ecology:
http://www.ecy.wa.gov/news/2011/016.html
http://www.ecy.wa.gov/programs/wr/hq/rwh.html
Please, PLEASE check the Wa. state D.O.E. website links above for the CORRECT information – I have seen too many articles, and interpretations that, In my humble opinion, grossly misrepresent the D.O.E.’s policy. . . but don’t take my word for it. If you read all of the information on the Washington state department of ecology’s website regarding rain water harvesting, it should become evident that in Washington state, it is now NOT against state law to catch rainwater runoff from the roof of your house in rain barrels, and a water right is not needed to do so. This topic is a precariously steep and slippery political slope – so I will try to avoid a lengthy rant about an individual’s right to unencumbered access to enough clean water and air to stay alive . . . .

Posted in slow sand water filter study and construction | 2 Comments

Just a reminder. . . .

On this blog, questions and comments relevant to roofwater harvesting / rainwater harvesting, biological sand water filters, and sustainable water filtration practices are encouraged. Also questions regarding the content of slowsandfilter.org, roofwaterharvesting.org, and shared-source-initiative.com/biosand_filter/biosand.html will be answered here. Comments are moderated and may not be posted if they are too far off topic.

Posted in slow sand water filter study and construction | 5 Comments